Kettlebell Group

How To: Snatch a Kettlebell – Safely and Effectively

Snatch

The Snatch is the Tsar of Kettlebell lifts as Pavel has said, because it demands qualities above the standard kettlebell training and Does Not accept excuses. It is not to be played with, as some amateurish attempt to show off how experienced you aren’t. You will lose. 

The Snatch requires proper breathing, rooting into the ground, shoulder girdle mobility and stability, grip endurance, proper hinging mechanics, rotary stability through the spine and core plus a reason to do it! If you are Snatching just because your friend said it’s good, you will end up eating it. It will not feel anything like you expected – you will be rendered useless and the Snatch, left a mess in the corner.

To make it feel good, a foundation has to be built to even attempt the Snatch. A heavy dose of Swings, Turkish Getups, Cleans, Squats and Presses are necessary. It doesn’t take kindly to rookies acting like they know what buttons to push and you may not get another chance to crack the Snatch with any tool, Kettlebell or otherwise. 

I’m not in the habit of chasing less than quality Snatch. It must be smooth from the bottom up and tasteful from the top down . A bad Snatch is forever putrid, while a good Snatch is always preferable for safety reasons. 

I have yet to find a Perfect Snatch, but that doesn’t stop me from looking. If I never find one, I know I will always have practiced with a safe Snatch. I wish you the same, Enjoy!


The Snatch can leave you breathless and quivering in minutes. The Foundation for capturing the most intense, jaw dropping and satisfying Snatch, can be Read Here, HereHereHere and Here first! Be ready for your first experience.

My good friend Pat Flynn just released an Article about: How to Freshen up Your Snatch. Pat is an exceptional writer who likes the Snatch too. The main point is, you must use your equipment wisely if you want a Fresh Snatch –Check it out Here

Standard Form

  1. All of the points that apply to the swing, minus the requirement to keep a straight arm and the kettlebell float
  2. Swing the KB off the ground between your legs and snatch it overhead in one uninterrupted motion to a straight-arm lockout
  3. Catch the KB ‘quietly’ without banging forearm or jarring your elbow and shoulder
  4. At the lockout, the arm must be level with the head or behind the head, the neck neutral and the lower back not hyper extended
  5. Maintain the fixation for a second with the arm and legs straight and the feet and body stationary
  6. Actively lower the KB between your legs in one loose uninterrupted motion close to the body without touching the chest or the shoulder and re-snatch
  7. Be explosive and practice the biomechanical breathing match

Progressions

  • All Points Apply from the Swing, First.
  • Lockout
  • Snatch
  • Drop
  • Switching Hands
  • Sparing the Calluses

A few notes:

  • Do Not Over grip the kettlebell. Instead think of your fingers as hooking onto the kettlebell, keeping your wrist straight.
  • You do not raise the kettlebell with your arms, you use the hips to power it up. The arms just pass the forces generated from the hips, think punch at the top.
  • Keep a Big Chest – I should be able to read your shirt throughout the movement, even at the bottom.
  • Push your Hips back as if closing the car door with your butt
  • Fast & Loose Relaxation Drills – Shake your arms and legs vigorously, as if trying to shake off water and belly breathe in between sets, to bring Heart Rate down
  • There are more: Check Back Later, Again be smart and send me a question if you’re not sure: John@BairKnuckleStrength.com 

Beginner’s Programming:

  1. Do 1 Repetition well, and then the next, etc.
  2. Practice a little at a time and do more when it feels appropriate, you will know.
  3. Do Not Rush, Do Not get ‘Tired or Fatigued’ – Just get Better at the movement.
  4. A few reps here and there or for a 10-15 minute session, with rest in between, sets of no more than 10 at a time to keep power output good. That’s what burns the calories.
  5. A good goal is to work a bell that’s appropriate for you, get to 100 snatches in 5 min or so and then if it feels good, go heavier and back to 40 reps. Work back to 100 etc…
  6. Focus on generating the most power per snatch, not the most snatches with the least power. 
  7. Use an appropriate weight.
  8. And eat clean, like meat, veggies and fruits….and tell me how you feel below in the comments section 🙂
Posted by John Bair in Fitness

Kettlebells can help you regain your Former Self and leave the ‘bench’ behind!

Happy New Year folks! It is my sincerest hope that you find your way toward maintaining your Independence until the day you die. I believe that to be the sincerest form of Freedom we have left. With New Year’s resolutions staring back at you as we speak, there can be a lot of anxiety and pressure to regain your health, especially if you haven’t been active for a while. Maybe you are a former athlete coming back from a long hiatus or someone who spent years building a business and family, but neglecting strength and wellness. Perhaps you were ‘lucky’ and never really had to do anything because your job kept you in shape, but now you’re retired and starting to feel the aches and pains? Where do you start?

StartStop

Well, the athlete, being true to their competitive nature will most likely rustle up the last program they were following and ‘get to work.’ The working crowds, well-meaning in every way, will Google the closest gym, buy a membership, ride the treadmill with the other hamsters and maybe even following a program clipped from the newest ‘Pump” or ‘Shapely’ magazine. Our retiree, possibly weary from years of work, will pick up an old hobby, golf let’s say and play, until some soreness crops up. Or worse, they have some injuries and are afraid to get hurt, so they do a whole lot of nothing. Now, before your curse me and say I’m generalizing or lumping together, I’m merely providing an abstract of a large population, bear with me.

None of these people are doing anything wrong! In fact, I sincerely applaud any effort above none. If you love riding the treadmill, I support you. If you are trying to relive some glory years and want to train like your athletic former self, Bravo my Friend. And if you just want to play a little golf and live out the good ole years, who the hell am I to even suggest that’s not correct? The goal of coaching is coaching the goal, Your Goal! Not Mine.

That’s where the picture can get a little clear. My concern, for those, coming off the Bench, if you will, is not truly appreciating Point A, as Dan John would say, or where you are right now, in regards to your Health and Fitness. Old Injuries cause muscle imbalances or joint problems, Skills diminish, Posture changes, Ability is restricted. If you cannot be brutally honest and assess your baseline, how can you ever know if you’re improving toward your goal, or Point B?  Even more horrific, is possibly shortening your life with choices that break your body down, not build it up.

Skeleton

Now, in all fairness, the ‘regular ’ person will know more about Point A, because they have no idea about Point B, or even how to get there. Average John knows he’s busted up, carrying some extra cheese love handles and can’t touch his toes. Average Jody has the ‘thunder thighs’ or ‘jiggly arm thing’ and it’s embarrassing, frustrating and extremely hard to want to change, Especially reaching out and admitting it to a complete stranger like me. Athletes, on the other hand, know exactly where they want to go, higher vertical, faster 40, lift more or Bigger, Faster, Stronger, right? However, athletes can deceive even themselves about their own abilities, possibly leading to injury and lost training due to that.

So, before we get to training, know where you are, your Point A and where you want to go, Point B. We can use SMART goals, as the acronym goes: Specific, Measureable, Attainable, Repeatable and Timely, because ‘I just want to tone up’, ‘I just want to drop a few pounds’ or ‘I just want to feel better’, while noble, have no direction. As the saying goes, ‘if you don’t know where you’re going any road will get you there.’ A SMART goal is: Lose 10lbs in 3 months, I’m 190lbs now, That’s 3.3lbs per month, or less than a pound a week, use proper training and dial in nutrition. You can do that in a safe, effective, repeatable and timely fashion, with the parameters you just created.

You can you find that information, with an Assessment of Course. Find someone, who can assess your fitness capabilities, limitations, muscle imbalance, asymmetries, postural deviances etc. with something like the Functional Movement Screen, but also a Nutritional Assessment and Mental Assessment about your level of commitment and ability to stay true to the task,  and give an honest evaluation of Point A. (I do Online Coaching with Virtual assessment, wink wink) 

roadmap

From there, Point B is fairly simple, as we reverse engineer the goal. I can now build a map to from A to B in the safest, most efficient manner. This is where the Kettlebells and Proper Movement come into play as we all have primary movement patterns. The Push (Horizontal/Vertical) Pull, (Horizontal/Vertical), Hinge or Bend, Squat, Rotation, Single leg and Locomotion (a few others but these are the most important, especially at the start again.)

The assessment will find out the weakest pattern and that is where you should start. Some of you may need to just Breathe and Walk, that’s it. If we find out you can’t breathe well, do you really think I’d be in business long if I told you to run a mile as a warm-up? If your nutrition is out of whack, intense training is hellacious and borderline criminal. If you can’t touch your toes, should I ask you to squat with a lot of weight, or any? What if your shoulders are dinged up and I told you press a heavy kettlebell? See my point? Good.

Now, the exercises we do before the Kettlebell and Lifting stuff can be called corrective exercise, but a better term is to call them assistance exercise, as Marc Andresen has said. They assist in the long term picture of your goal. At first, learning to breathe, re-educating your hips and moving your shoulders can be very taxing and tiring. Guess what, if you’re muscles are fatiguing, you’re breathing hard and maybe even sweating when you learn the movement properly then that’s the workout!

Before lifting stuff and doing all the fun things, we have to make sure your body is capable of handling it. The hierarchy is:

  • SMART Goals – Specific, Measureable, Attainable, Repeatable, Timely
  • Adequate Nutrition which includes Hydration
  • Breathing well, mobility and patterning natural movement
  • Stability and Cementing those patterns with strength like Goblet Squats, Turkish Getups, military presses
  • And then we can do the fun dynamic stuff like Kettlebells Swings, Cleans and Snatches which just incinerate fat but also strengthen muscles in the most important places
  • Followed closely by Recovery including Sleep, Massage or Foam Rolling, Yoga and Brisk Walking (as Pat Flynn has reminded me is so effective!)

yogaOLYMPUS DIGITAL CAMERAYou don’t need all kinds of crazy intense stuff, especially if I lay you on your back, have you stick your legs straight up in the air and you can’t even hold them there because you’re legs cramp and abs shut down. Proper exercise should mimic you’re goal and keep you healthy in the process, so you can go do the thing that you’re training for!


womanrunning
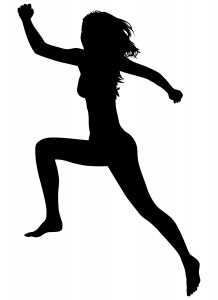
If it’s to run a 5k, you’ve got to move well, transfer the force of pounding the pavement and have the strength to do it. If it’s to lose 10lbs, your muscles have fire properly in a sequence, producing enough stress to force the system to burn the fat. Want to have joints that don’t ache and play with your grand kids? Maybe even Dancing with the Love your life in the pale moon light? Then breathing and moving well, with the strength to enjoy those experiences, may be all you need. Take the time to find out Point A and every decision you’ll make just became exponentially easier because every choice will either move you closer, or further from your Point B.

  1. If you’re ready to put it all together, but don’t know where to go, you’re in Luck. Wherever you are in the World, I can help: with my Online coaching program
  2. If you’re local to me, Montgomery County PA and would like to work closer with me, please contact John@BairKnuckleStrength.com with the Subject line ‘Kettlebell Training’ and I will get back to you ASAP.
  3. If you’ve been assessed and have been given the green light and you’re aching to try something like Kettlebells, then this video, the first in a series of 6, is for you, Start Here! 
  4. Again, I truly want you have the Best year of your Life and If none of those options work for you, then grab my free report, The Top 5 Red Flags to Fix: Before Training,  do the exercises and Follow my videos. This is as close to an Assessment as you can get from me without having to pay for it!

RedFlag

At any time you need assistance, Email me John@BairKnuckleStrength.com and I’ll be there.

Let’s catch this year off guard, kick it where the sun don’t shine and take control of your Destiny!

Posted by John Bair in Fitness, Mindset

How To: Clean a Kettlebell – Safely and Effectively

Hello Friends. Back from the Holiday Splurge it’s time to Clean up a bit before New Year’s. The Kettlebell Clean is an extremely simple exercise to learn and can also be the most frustrating. The Swing teaches us Force Production and Reduction, while the Kettlebell Clean teaches us Force Re-Direction. Mentally visualize the Clean as a 1 arm swing that ends in the ‘Top of the Pull-up’ position or the Rack and with a ‘Quiet Elbow’

Kettlebells in general teach us how to create tension and relaxation through the cycling of maximum voluntary contractions. This is extremely important because it mimics the need to decelerate in sport and ‘turn on a dime.’ Our muscles can now safely guide us through the gauntlet of starting and stopping without the stress of those movements going to the wrong places.

In short, the Clean keeps our athletic potential much safer by teaching us to dissipate force as needed while toughening the hands, forearms and body to ‘take a blow.’ If you can’t clean, I wonder about transmitting force in an athletic endeavor.

Clean

A Kettlebell clean showcases the martial mix of relaxation and tension this system is known for. The differences from Olympic cleans are NOT shrugging the shoulders, keeping the elbows in, puffing the chest, dipping under or growing tall.

Why even do this movement? Great Question. As stated earlier this movement has a way of toughening the body for contact and also creating a more explosive athlete by learning to drive the hips and re-direct that force. The Kettlebells float to your forearm, creating 3 points of contact on the forearm, bicep and chest, becoming one with the bell.

This is called the ‘Rack’ position and It’s is a great way to start pressing Kettlebells overhead (Be sure to check the next video), or front Squatting with the bells on your forearms. Heck, just racking 2 heavy kettlebells and walking will teach your body to breathe under pressure and tension. Another invaluable skill in combat and life.

Progressions

· All points apply from Swing, First

· Grip, Straight Wrist

· RKC Plank

· Cheat Clean, Rack Hold

· Dead Clean

· Drop

· Clean

Standard Form

1. All points that apply to the swing, minus the straight-arm requirements on the top and the float requirement

2. The Kettlebell, the elbow and the torso ‘become one’ on the top of the clean. The shoulders must be pressed down. The wrist must be straight.

3. The Kettlebell travels the shortest distance possible

4. The Kettlebell comes in contact with the forearm ‘quietly’ no impact

5. Women may not hit their breast with their arms or KBs for health reasons

A few notes:

  • Do Not Over Grip the Bell, use a Loose ‘Hook” grip
  • Do Not Bang Your Forearms Up
  • Power Breathe on the way up, not at the top
  • Soft Catch – Quiet Elbows
  • Fast & Loose Relaxation Drills – Shake your arms and legs vigorously, as if trying to shake off water and belly breathe in between sets, to bring Heart Rate down
  • There are more: Check Back Later, Again be smart and send me a question if you’re not sure: John@BairKnuckleStrength.com

Beginner’s Programming:

  1. Do 1 Repetition of the first progression well, and then the next, etc.
  2. Practice a progression at a time and move on when it feels appropriate, you will know.
  3. If you feel you could do 50 clean repetitions of a progression, try another. Just do 50 sets of 1.
  4. Do Not Rush, Do Not get ‘Tired or Fatigued’ – Just get Better at the movement.
  5. A few reps here and there of just one step, then piece it together
  6. A good goal is to work the progressions until you can do it fluidly on both sides, cheat clean then dead clean, then full clean.
  7. Focus on proper alignment and use a a regression as necessary.
  8. A great way to get it all together, Do Some one arm swings, put it down – cheat clean and dump into one arm swing, then set down. Cheat clean, dump into one arm swing and then re-trace steps. Voila!
  9. And eat clean, like meat, veggies and fruits….and then tell me how you feel below in the comments section 🙂
Posted by John Bair in Fitness

How To: Kettlebell Goblet Squat – Safely and Effectively

Bodyweight Squat/Goblet Squat/FrontSquat

Squatting is extremely natural and before the advent of the chair, was our resting posture. Just watch a baby who is starting to go from crawling to standing, as the mode of transportation. Said infant will be on all fours, big smile, rocking back and forth near a coffee table or something similar. Before you know it, one knee goes down into kneeling, the other up in a lunge and the hands go on the edge of the table. There is a pulling action, yes even babies understand the ‘pull up’ (which we can all do with practice) and the other foot comes underneath the baby as they work to a standing position, and then promptly fall on the bum, maybe a little wail and they’re right back at it. Eventually, they will learn to catch themselves at the bottom and not fall over. Ta-Da, This baby is now sitting in a squat.

baby-squat

Years later, after this tyke goes to school, they will learn to sit a different way, in a stiff chair 🙁 With physical education programs being cut down to almost non-existent, things like Squatting, push-ups and pull-ups get lost in the mix. True Strength is stunted as these movements are all very natural to us and taking them away, limits the combined effects of an academic and physical background. Movement nourishes the brain, as food nourishes the body, furnishing a sensory rich environment and allowing true learning to take place. These things enhance the effects of each other and go hand in hand.

The Goblet Squat is an excellent knee saver, leg strength builder and increases flexibility, by teaching abdominal pressurization. Enjoy the Awesomeness that is: Squatting 🙂

Now, the Squat can be technical, with more loading, single leg squats and the like, but let’s not make it so difficult right now. After all, we already know how to do it. Essentially, you sit down, between your legs in a resting position, ass to heels, with your back straight up and down and a proud chest. The knees do not cave in, rather they point over the little toes and track them. Do not relax at the bottom and the back does not round like a ‘C’ or flex, I merely demonstrated it to show you what not to do.

Maybe you sit at a desk for a living and rarely if ever, see the bottom of a squat position. We can get it back, with this movement. As you can see, my squat is stiff. Major ankle injury and some underlying hip/ankle issues from years of football have robbed me of some mobility. I am working to get it back and I will. As stated, if you have knee flexion issues, tight hips and ankles, this is going to take a little effort on your part to regain the mobility to get here. For me, I’m happy with the progress I’ve made but know there is work to be done. For you, the benefits are many. Squats ARE NOT bad for your knees. Squatting bad is bad for your knees. If you have more serious concerns, Listen to your Body and only go as far as it allows.

Standard Form

  1. A neutral spine is maintained
  2. The Heels and toes are planted
  3. The knees track the toes
  4. Pause Momentarily on the bottom while staying tight
  5. Initiate the ascent with a grunt
  6. The hips ascend at the same rate as the shoulders, not faster
  7. The hips and knees extend fully on the top of the squat
  8. Women may not apply pressure to their breasts (hold the bell/s just off chest)
  9. Neck Remains Neutral

Parallel = the top surface of the leg at the hip joint is lower than the top of the knee

Progressions

  • Quadruped Rocking ( Not shown but you do this on all fours, keep big chest and push back into hips, maintain spine alignment)
  • Assisted Squat (Dowel rod, doorknobs, suspension straps)
  • Bodyweight Squat
  • Goblet Squat
  • Prying (at the bottom of squat, brace abs for punch, then push knees out slightly and pry knees open)
  • Pulling into Squat with Hip Flexors (Imagine pulling your knees to your chest as you sit down, bracing the abs and engaging the hip flexors)
  • Front Squat ( Clean 2 bells and Squat, standard form still applies)

Beginner’s Programming:

  1. Do 1 Repetition of the first progression well, and then the next, etc.
  2. Practice a progression at a time and move on when it feels appropriate, you will know.
  3. If you feel you could do 50 clean repetitions of a progression, try another. Just do 50 sets of 1.
  4. Do Not Rush, Do Not get ‘Tired or Fatigued’ – Just get Better at the movement.
  5. A few reps here and there of just one step, then piece it together
  6. A good goal is to work the progressions until you can sit in a comfortable bodyweight squat and then use the goblet squat to find some more mobility.
  7. Focus on proper alignment and just go as far as the body will allow
  8. And eat clean, like meat, veggies and fruits….and tell me how you feel below in the comments section below 🙂
Posted by John Bair in Fitness

How To: Perform a Turkish Get – Up Safely and Effectively

Turkish Get Up – A Postural Alignment and Strength Movement

The Get-Up Promotes the Shoulders Mobility, Stability and Resilience. Improving Strength by teaching the body proper power “linkage”, not power “leakage.” The body learns to move in a connected, beautiful fashion. This movement has been called the Functional Movement Screen in exercise form. What the Hell does that mean? This movement is a full body assessment. Practitioners can use this movement, as a baseline for the days session. They will be able to tell right away, whether a person is connected, proper muscle activation and ‘online.’ Non Practitioners can also baseline their own movement. If your Get-Up feels choppy, sloppy and ‘disconnected’ then it’s probably a good bet that ‘something’ is going on with the body. Too much stress, too little sleep, not enough recovery etc.

So why do this movement? Ever heard ‘I’ve fallen and I can’t Get-Up?’ Well…Ok so that’s not the only reason, but imagine getting up, off the ground, with 100lbs in one arm…Or getting up after slipping on the ice with your newborn in your arms (you’re not going to drop the baby are you?) How about being able to play with the grandkids?  Or this scenario, The enemy is advancing and you decide to turn your back, get to your hands and then get up. You would turn your back on someone who can kill you? I think not. This movement has a broad spectrum of people that can benefit. Like everyone.

In fact, Strong Men of yester year would insist that a student be able to get-up with 100lbs over head, before they would ever consider teaching you further feats of strength. You had to show the resolve and fortitude necessary, to simply earn your right to get up. In today’s world, we have so much at our fingers, things can literally be done for you in most fashions. But you still have to move and we are still designed how we were thousands of years ago. Just because things are convenient, doesn’t mean you can’t use your body the way nature intended.

The Highest form of Selfish is burdening others with your responsibilities and If you don’t take care of yourself, eventually someone else will.

If I could Only teach one Exercise, it would be this one. It’s that’s good. A Get-Up should never be executed poorly. Reason being, you have every opportunity to make sure your posture is aligned, at every step. Check in, make sure your chest is big, shoulders in their sockets and hips aligned with your midsection braced.  Moving through this quickly is a no no, rather move through this ‘Tai Chi’ slow, as Dr. Mark Cheng would say.

Beautiful Strength is another term for this movement and I agree wholeheartedly. Watch a Master move with skill, grace and fluidity and you will be in awe. Quite a sight to behold.

On the other Hand, a bad Get Up sticks out like a bad joke. Both mean well and in the end, somebody usually gets hurt. It’s sloppy, rushed, the teacher has no concept of how to teach it and or the student get’s frustrated because it’s not easy or sexy. Sorry, but Tough Noogies. It’s simple when you break it down and we’re doing them. Again, Get-Up with 100lbs over your head and I personally want you on my team. Having big muscles and lifting lot’s of weights doesn’t mean anything unless you can put it together.

I showed you 7 steps. There is also no reason to be annoyed or overwhelmed. Do 1 Step at a time and then the next, until it becomes second nature. And if you ever need a refresher, Please look below for the standards.

Over time, as you start to understand the movements leading up to a Get-Up, you will seek more information. How to use it for Strength, Power and Conditioning. How to Get Up heavier etc. and guess what, that information will be right here, waiting for you. This post gives you a blueprint to build a foundation. Go, Build!

Progressions – Top Down

  • Arm Up – Reverse Lunge
  • Reverse Lunge to Windshield or Open
  • Windshield to Hinge, Hand Down
  • Hand Down to Tall Sit
  • Tall Sit to Elbow
  • Elbow to Shoulder-Shoulder
  • Shoulder-Shoulder to Fetal
  • Reverse – Go Back Up
  • Keep The Transitions as Smooth as Possible, No Jerky Movements.

Progressions – Bottom Up

  • Pick Up, Set Down, Switch Sides -Fetal Position
  • Shoulder Packing – Roll to Back
  • Tall Sit – Elbow
  • Tall Sit – Hand
  • Low-Sweep
  • Windmill – Half-Kneel
  • Stand-Up
  • Get-Down 
  • Keep The Transitions as Smooth as Possible, No Jerky Movements.

Standard Form

  1.  Use both hands to lift the KB off the ground to the starting position of the floor press and to return it to the ground
  2.  The wrist on the Kettlebell side is neutral
  3.  The elbow on the kettlebell side is locked and the shoulder packed
  4.  The shoulder of the free arm does not shrug up
  5.  The heel of the foot on the kettlebell side stays planted during the low sweep, the lunge to standing and the reverse of these actions
  6.  The knee touches the deck silently on the decent into half kneeling position
  7.  The arm holding the kettlebell is vertical or almost vertical
  8.  The neck is neutral for the top half of the movement, from the lunge up
  9.  In the top position the knees are locked and the lower back doesn’t hyperextend

A few notes:

  • At any point you feel unstable or hesitant, stop and go back a move or 2
  • The first move from the grund up to elbow, is a ROLL, not a crunch
  • Look at your hand/bell the whole time, except getting up from lunge, and getting down to lunge – there you look straight ahead
  • Fast & Loose Relaxation Drills – Shake your arms and legs vigorously, as if trying to shake off water and belly breathe in between sets, to bring Heart Rate down
  • There are more: Check Back Later, Again be smart and send me a question if you’re not sure: John@BairKnuckleStrength.com

Beginner’s Programming:

  1. Do 1 Repetition of the first progression well, and then the next, etc.
  2. Practice a progression at a time and move on when it feels appropriate, you will know.
  3. If you feel you could do 50 clean repetitions of a progression, try another. Just do 50 sets of 1.
  4. Do Not Rush, Do Not get ‘Tired or Fatigued’ – Just get Better at the movement.
  5. A few reps here and there of just one step, then piece it together
  6. A good goal is to work the progressions until you can do it fluidly on both sides, with a shoe balanced on your fist, then a dixie cup filled half with water
  7. Focus on proper alignment at each step and never feel you have to do the whole thing. Just one part at a time.
  8. A great way to get it all together, Put 5 minutes on the clock and do one left, one right etc….Or Step 1 Left, Step 1 Right, Step 2 Left, Step 2 Right, etc. Be able to do the whole 5 minutes and get better at doing that.
  9. And eat clean, like meat, veggies and fruits….and then tell me how you feel below in the comments section 🙂
Posted by John Bair in Fitness